
Instead of manually coordinating MLS listing prep junk removal through scattered messages, use a written workflow that connects the item inventory, independent provider scope, photography handoff, and final property check. This 2026 guide takes you from listing preparation to move-in handoff without treating junk removal as a substitute for cleaning, repairs, or safety checks.
TL;DR
- MLS listing prep junk removal starts with written removal authority and a room-by-room inventory, not a pickup request.
- Expelled connects homeowners and property professionals with independent providers for property cleanouts, junk removal, and hauling.
- Separate pre-photography decluttering from final move-out removal; each needs its own scope and completion check.
- Confirm retained items, access, exclusions, and cleaning responsibilities before approving removal.
Why this matters
A listing cleanout and a move-in handoff have different finish lines. Before photography, you need the agreed presentation areas cleared; before possession, you need the agreed property condition checked against the transaction requirements.
Expelled is best for homeowners and property professionals seeking connections with independent property cleanout and junk removal providers. Expelled is a marketplace, not the company performing the cleanout. You still need to confirm the provider's scope, accepted materials, access arrangements, and responsibilities.
The practical benefit is a way to find and connect with independent providers. The limit is equally important: a connection does not establish who can authorize removal or whether the finished property meets your sale agreement.
Before you start
- Authority and materials: Have written instructions from the person authorized to approve removal, the listing or handoff requirements, current property photos, and a room-by-room item inventory. Resolve ownership disputes before requesting removal.
- Access and coordination: Identify the property contact, independent provider contact, entry arrangements, building restrictions, and any separate cleaning or repair contractors. Keep sensitive access details out of broadly shared documents.
- The easy-to-miss gotcha: Furniture, appliances, staging pieces, and belongings left for a buyer are not automatically junk. Create an explicit retained-item list before anyone loads a vehicle, and flag paint, chemicals, batteries, and other materials requiring separate acceptance checks.
Removal scope and milestone plan
Use a shared document or spreadsheet rather than relying on a message thread. The bold labels below are suggested worksheet headings, not platform buttons or settings.
- Create the job record. Label the document 2026 Listing Cleanout Plan and enter the property identifier, authorized decision-maker, property contact, and document revision date. Choose one person to approve changes so different contacts do not issue conflicting instructions.
- Define the milestones. Add Before Photography, Before Showings, and Before Possession as separate checkpoints. Describe the condition required at each checkpoint; do not assume every room must be emptied before photographs.
- Inventory by location. Under Remove, Retain, and Review, list items by room, closet, garage, and exterior area. Treat anything under Review as excluded until an authorized person gives written instructions.
- Document the evidence. For each room, capture at least 2 photos: one wide view and one closer view of the removal items. Add detail images where an object, doorway, staircase, or retained item needs explanation.
- Describe the access route. Record floors, stairs, elevator rules, loading restrictions, narrow openings, and locked spaces. Measure uncertain clearances in inches rather than describing a large item as something that should fit.
Expected result: You have an approved inventory that distinguishes what leaves, what stays, and what still needs a decision. A provider can review the proposed job without guessing from a listing photograph.
!Workflow connecting removal authority, inventory, provider scope, removal, and property handoff
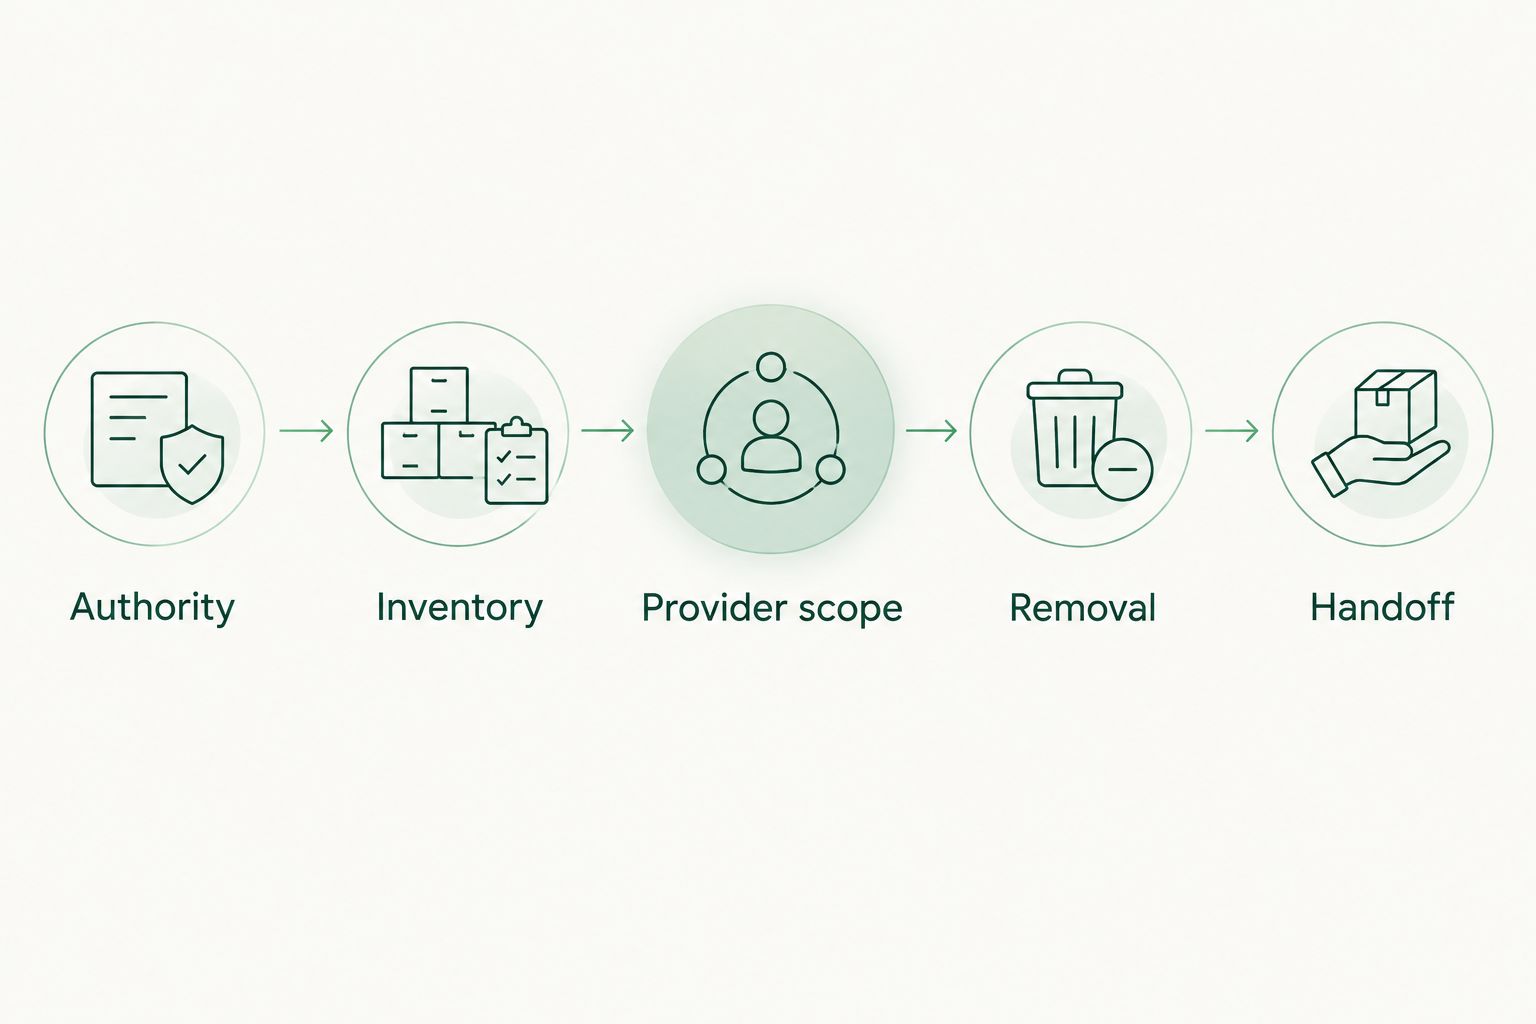
*Written authority and an inventory come before provider instructions.*
Choose the removal stage deliberately
A single removal visit and staged removal solve different problems. Compare them against the property's occupancy and transaction needs, not an assumed service package.
| Approach | Best for | Advantage | Limitation | |---|---|---|---| | Pre-photography removal | Listings with unwanted items blocking presentation areas | Clears the agreed areas before images are taken | Does not address belongings left behind later | | Final move-out removal | Properties that remain occupied during marketing | Keeps needed belongings in place until departure | Requires coordination with the possession deadline | | Staged removal | Listings needing both early decluttering and a later clear-out | Separates presentation needs from final handoff | Requires separate scope confirmations and checks |
Choose staged removal when the approved inventory changes between photography and possession. Do not treat an early cleanout as proof that the property is ready for its final handoff.
Independent provider scope and access
The provider briefing should describe the work, not just the desired outcome. Saying that a house needs to be listing-ready leaves too much undefined.
- Send the same brief to each provider. Share the approved inventory, relevant photographs, access conditions, and requested milestone. Ask each independent provider to identify accepted items, exclusions, and any information needed before confirming the scope.
- Compare written responses. Use Accepted Items, Exclusions, Access Requirements, Responsibilities, and Schedule Confirmation as comparison fields. Ask whether any part of the assessment remains subject to an on-site review.
- Verify relevant credentials directly. Ask for documentation appropriate to the work and property requirements, including applicable licensing and insurance information. Do not treat a listing, badge, or conversation as a substitute for checking the documents you require.
- Assign access responsibility. Record who will admit the provider, who can answer questions during removal, and who can approve a change. Confirm building or association requirements with the responsible property contact before the visit.
- Confirm the finish condition. Specify whether the job includes only loading and hauling or any additional agreed tasks. Arrange cleaning, repairs, and other property services separately unless those tasks are explicitly included.
Expected result: You have a written provider scope with a named property contact, clear exclusions, and an agreed process for changes. Neither the agent nor the provider has to infer permission from an unlocked door.
For a reusable coordination framework across several properties, see the junk removal guide for property managers.
Provider briefing template
Copy this structure into your job document and replace each instruction with property-specific information:
- Authority: Identify who approves disposal and who approves changes.
- Inventory: Describe removal items by location and reference the current photos.
- Provider scope: Record accepted materials, excluded items, access conditions, and agreed responsibilities.
- Removal: State the requested milestone and the confirmation still needed.
- Handoff: Name the person checking the finished areas and recording unresolved work.
Keep requests separate from confirmed arrangements. A requested date in your 2026 listing plan is not a booking until the independent provider confirms it.
Removal and photography handoff
A removal visit needs a controlled start and a documented finish. Use the approved inventory throughout; a verbal instruction given at the door should not silently replace the written scope.
- Walk through before loading. Identify the items to remove and point out retained belongings. If you use removable labels, combine them with the inventory rather than relying on labels alone.
- Pause on uncertainty. Keep disputed, unlisted, or unexpectedly discovered items in place. Obtain approval from the authorized decision-maker before changing the removal scope, and confirm any provider implications before proceeding.
- Check the agreed areas. Review every included room and storage area after removal. Compare the result with the inventory, including shelves, closets, garage corners, and exterior locations that were part of the job.
- Record completion and exceptions. Take after photos from the same positions as the before photos. List unfinished work, excluded materials, and any observed damage separately instead of marking the whole property complete.
- Release the next task. Tell the cleaner, repair contractor, stager, or photographer which areas are ready and which remain restricted. Confirm that the next contractor's own requirements are met before authorizing entry.
Expected result: You have a documented cleanout result and a clear handoff to the next task. Photography readiness means the approved presentation work is complete; it does not certify the home's condition.
Keep presentation and possession records separate
Save the approved inventory and completion images under the relevant milestone. Label a photography-stage record 2026 Photography Handoff so nobody mistakes it for the later possession check.
This distinction matters when occupants continue living in the property. New packing waste or belongings left after a move require a fresh decision, even if the listing photographs show clear rooms.
Final condition and move-in handoff
Move-in ready is a handoff goal, not a junk removal service description. Check the property against the applicable agreement and the responsibilities assigned to each party.
- Repeat the inventory after departure. Check the rooms and any included storage, garage, and outdoor areas. Identify newly left items rather than adding them automatically to a previous removal authorization.
- Reconcile retained belongings. Compare items remaining in the property with the written retained-item list and transaction instructions. Ask the responsible transaction professional to resolve inconsistencies before arranging further disposal.
- Separate outstanding tasks. Track removal, cleaning, repairs, and safety concerns under different headings. A hauled-away sofa does not resolve a damaged floor, and an empty room does not establish that its systems work.
- Close the handoff record. Save final photographs, unresolved issues, responsible contacts, and relevant completion confirmations. Follow the transaction's instructions for keys, access devices, and possession rather than sharing them in the provider brief.
Expected result: Your 2026 Possession Handoff records what was checked, what remains unresolved, and who owns each next action. It does not replace inspections, contractual obligations, or professional advice.
Variant: update the workflow after the scope changes
Use a revision workflow whenever the seller changes the move-out plan, the buyer and seller revise retained items, or a contractor identifies additional debris. Do not let the provider work from an obsolete attachment.
- Issue a revised inventory with a new revision date.
- Summarize additions, removals, and retained-item changes at the top.
- Ask the independent provider to confirm the revised scope and arrangements.
- Notify affected cleaners, photographers, property contacts, or contractors.
- Preserve the previous version as a record, but mark it superseded.
Best for occupied listings: Keep the pre-photography inventory and final move-out inventory separate. This takes more coordination than a single static list, but it avoids treating later belongings as already approved for disposal.
Troubleshooting
A retained item appears in the removal pile
Stop loading that item and check the approved inventory. Obtain written clarification from the authorized person; physical placement alone is not sufficient evidence that the item should leave.
The provider cannot accept a material
Exclude it from the load and ask about the appropriate handling route. Check local disposal guidance for regulated materials rather than asking the provider to take an unspecified container or substance.
A doorway, elevator, or loading area blocks access
Pause the affected task and document the obstruction. Confirm a revised access plan with the provider and property contact; do not authorize dismantling or property alterations without specific approval.
Items remain after the job is marked complete
Compare the remaining items with the accepted scope and after photos. Separate missed agreed work from excluded or newly added items, then request the appropriate correction or revised scope.
Photography or possession timing changes
Update the milestone plan and contact everyone whose work depends on it. Keep the old arrangement open until the provider confirms a replacement; do not assume a changed calendar entry changes the booking.
Customize your workflow
For recurring listings in 2026, reuse the document structure but create a fresh inventory and authorization for each property. Copying a template saves organization; copying another property's disposal decisions creates avoidable risk.
You can use Expelled to connect with independent providers for property cleanouts and junk removal. Confirm the actual job requirements directly with the provider, including material acceptance and the requested service location.
FAQ
What is the best way to organize MLS listing prep junk removal?
Start with written removal authority and a room-by-room inventory. Separate retained belongings from removal items, then confirm the independent provider's scope before the visit.
Should junk removal happen before listing photographs?
Remove approved unwanted items before photography when they interfere with the planned presentation. Keep needed belongings and agreed staging items in place, and plan a separate final check after move-out.
Does Expelled perform property cleanouts?
Expelled connects homeowners, property professionals, and businesses with independent providers offering property cleanouts, junk removal, and hauling. The independent provider's agreed scope determines the work to be performed.
Can the real estate agent authorize disposal of everything left behind?
Do not assume the agent has authority to approve every disposal decision. Confirm authorization with the responsible owner or authorized representative and resolve disputed items before removal.
Does junk removal make a home move-in ready?
Junk removal alone does not establish that a home is move-in ready. Cleaning, repairs, safety concerns, and transaction-specific requirements need separate checks.
What should I send an independent provider before a cleanout?
Send an approved item inventory, current photos, access conditions, retained-item exclusions, and the requested milestone. Identify who can approve changes and ask the provider to confirm material acceptance.
What happens if more items need removal after the first visit?
Create a revised scope and obtain fresh confirmation from the independent provider. Additional items are not automatically covered by an earlier cleanout agreement.
One last thing
Your last property check should look for items that stayed, not just items that left. Compare the retained-item list with the final walkthrough record before closing the removal task; an empty room is not the correct result when an agreed item belongs there.